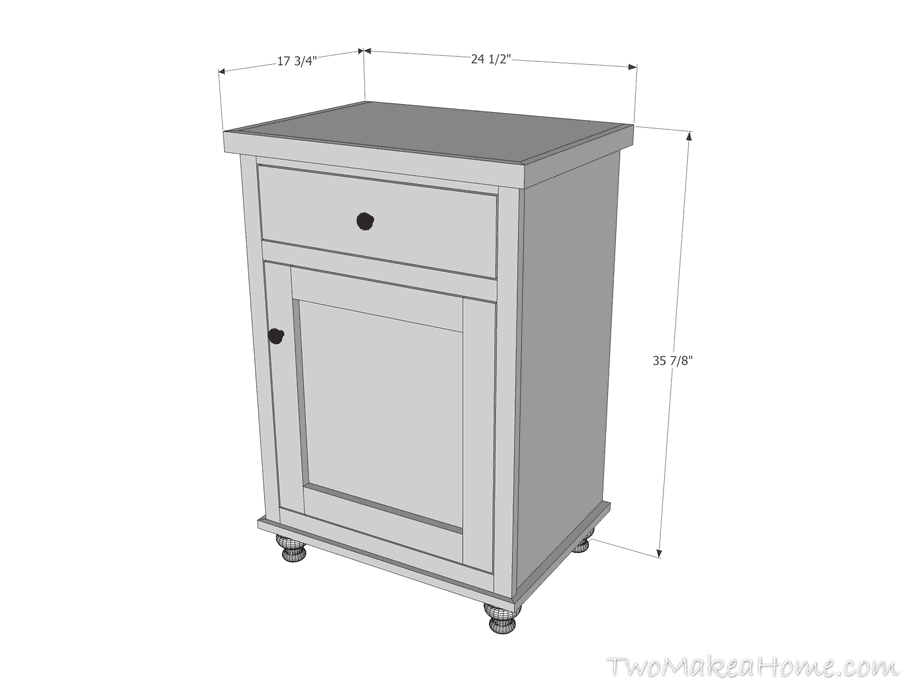
We’ve needed some additional storage in our dining room for quite a while. We need something with a drawer for placemats and a cabinet for the kids’ art supplies. The only space for a cabinet is between the refrigerator and the basement door. It’s kind of a tight spot and to make matters even worse there is a light switch on that wall that prevents having a tall cabinet. So I got creative and drew up these plans for a short standalone cabinet with bun feet. It will work perfectly in that space and now that I’ve completed the plans I realize that there are so many other places it could be used as well.

Contents
Tools:
- Circular saw
- Miter saw
- Drill
- Pocket hole jig (like the Kreg Jig)
- Brad nailer
- Table saw (optional)
Tips:
- Work safely and don’t rush.
- Read the entire plan before getting started.
- Use glue on all joints between wood pieces.
- Predrill holes before using screws to avoid splitting.
Step 1
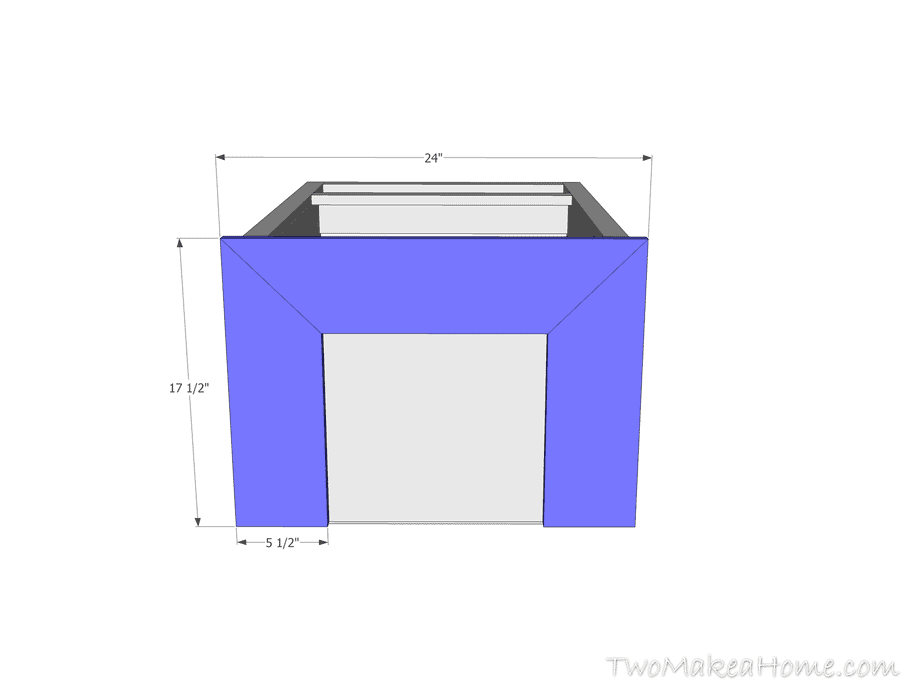
Cut the sides and bottom of the cabinet from ¾” plywood. Cut two 1” x 4” pieces to tie the sides of the cabinet together at the top (this saves on plywood since the top will be added in a later step). Drill pocket holes in the bottom of the bottom piece, inside the front edge of the side pieces, and on the ends of the 1 x 4’s. Drill holes for shelf pins on the insides of the cabinet sides. Assemble all the pieces using pocket hole screws and glue

Step 2
Cut the back from ¼” plywood and assemble using wood glue and brads.

Step 3
Build the face frame from 1×2’s. Cut the pieces to length, drill pocket holes in the ends of the horizontal pieces. Assemble using pocket hole screws and glue.

Step 4
Cut the bottom trim from 1×6’s. Miter the ends as shown and drill pocket hole screws at the miters. Screw the trim pieces together, then attach the assembly to the bottom of the cabinet using glue and brads.
Step 5
Cut drawer slider supports to fit inside the cabinet from 1×2’s. Align the bottoms of the drawer supports with the top of the middle horizontal rail on the face frame. Attach to the inside of the cabinet with wood screws and glue.

Step 6
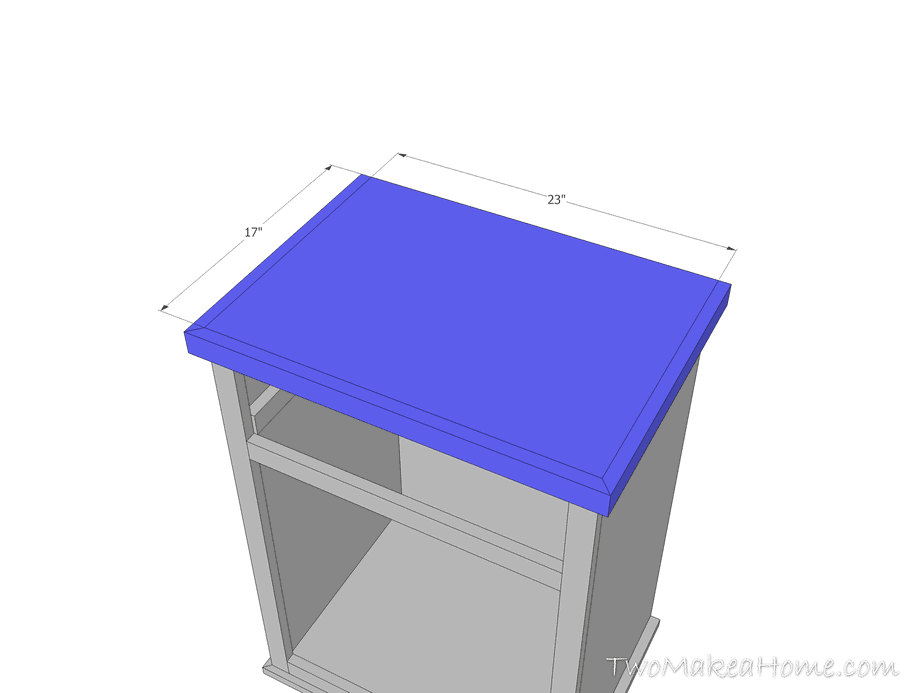
Cut the top from ¾” plywood to the dimensions shown. Drill pocket holes on the bottom of the plywood piece at the front and side edges. Miter 1×2’s to fit and attach to the top using pocket hole screws and glue.
Step 7
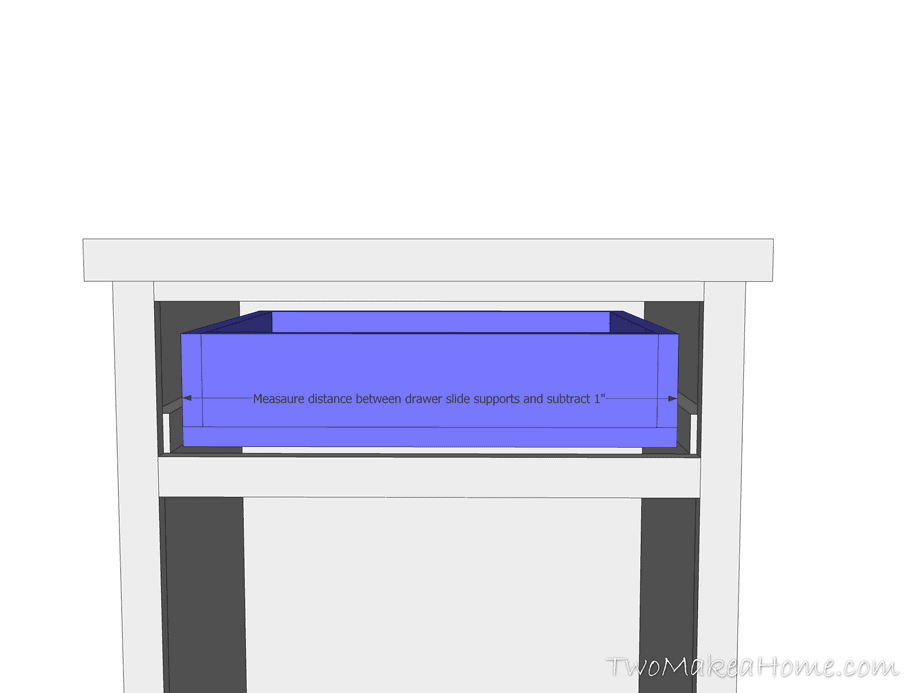
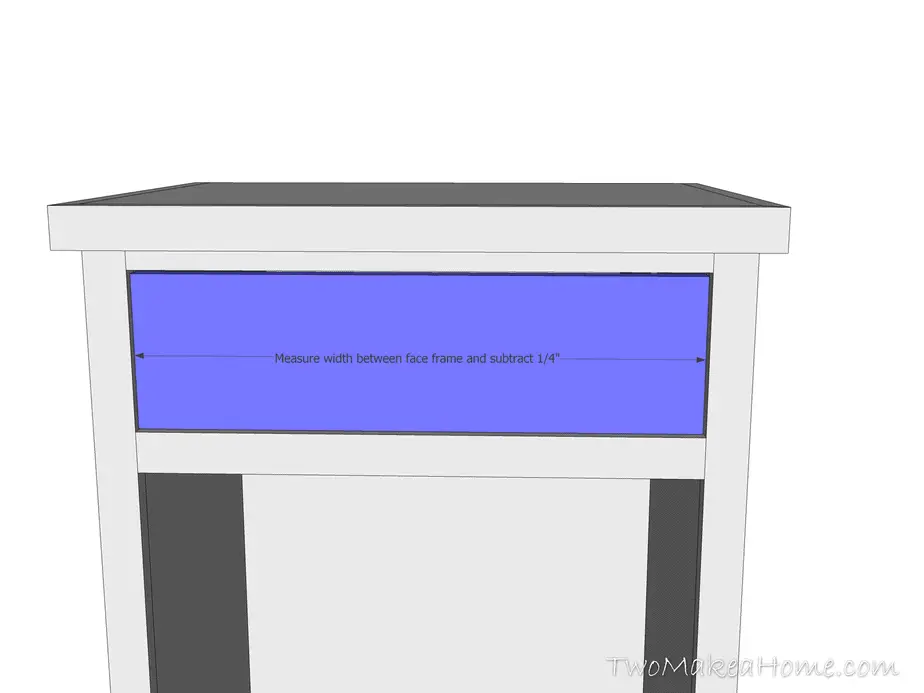
Build the drawer box from plywood (¾” or ½”) alone or plywood and 1×4 boards. Measure the distance between the drawer slide supports and subtract 1” to determine the width of the drawer. Cut the sides to size and assemble with glue and brads. Make sure the sides are square then attach the bottom with glue and brads as well. Attach drawer slides to the supports and sides of the drawer and adjust so that the drawer closes smoothly and the front of the drawer box is inset from the front of the face frame by ¾” when the drawer is fully closed.
Step 8
Cut the drawer front from a 1×6 board. Predrill holes in the front of the drawer box slightly larger than the diameter of the screws you will use to attach the drawer front. Adjust the drawer front so that there is an 1/8” gap all the way around and attach the drawer front to the front of the drawer box with wood screws. Double sided tape will help to hold the drawer front in place on the drawer box.
Step 9
Attach the bun feet with wood screws and glue.

Step 10
Cut the shelf from plywood or a 1×12 board.

Step 11
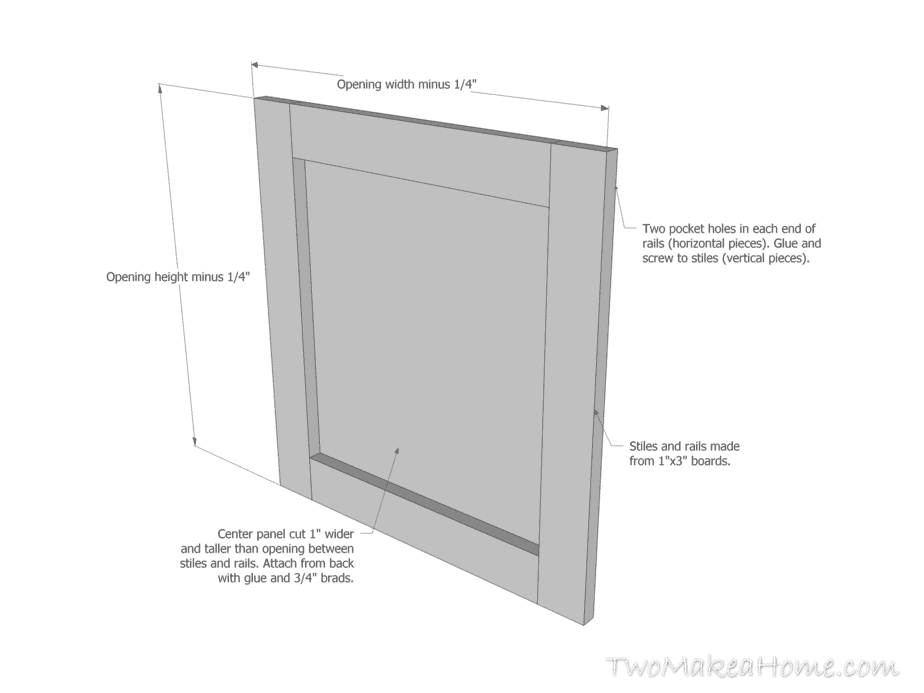
Build the door as shown. Attach with hinges for a full inset cabinet door after painting.
Finishing
Fill nail holes and sand the surfaces with appropriate sandpaper (150 for paint, 220 for stain and poly). Wipe down all surfaces with a tack cloth or rag dampened with water (latex paint) or mineral spirits (stain). Finish with desired paint or stain.


